A Better Bay
with Branch Concept

A column in a bedroom. A beam across the living room. A floor assembly that eats into the ceiling height. Conceptually we know structural choices shape the architecture early - but it’s not always easy to quantify how they affect the hard lines of outputs. In this residential bay study, we used Branch Concept to test a few framing options and see the results.
The study looks at two one-bedroom layouts within the same 25 × 30 ft footprint, with five framing options for each. Across post-and-beam, purlin-and-girder and point-supported plate systems, we compared where columns land, how deep the structure becomes and how much material each option uses. From the far left, we explored long span framing, then 1 and 2 intermediate purlins, adding an additional column, and then for the final option and post and plate option.
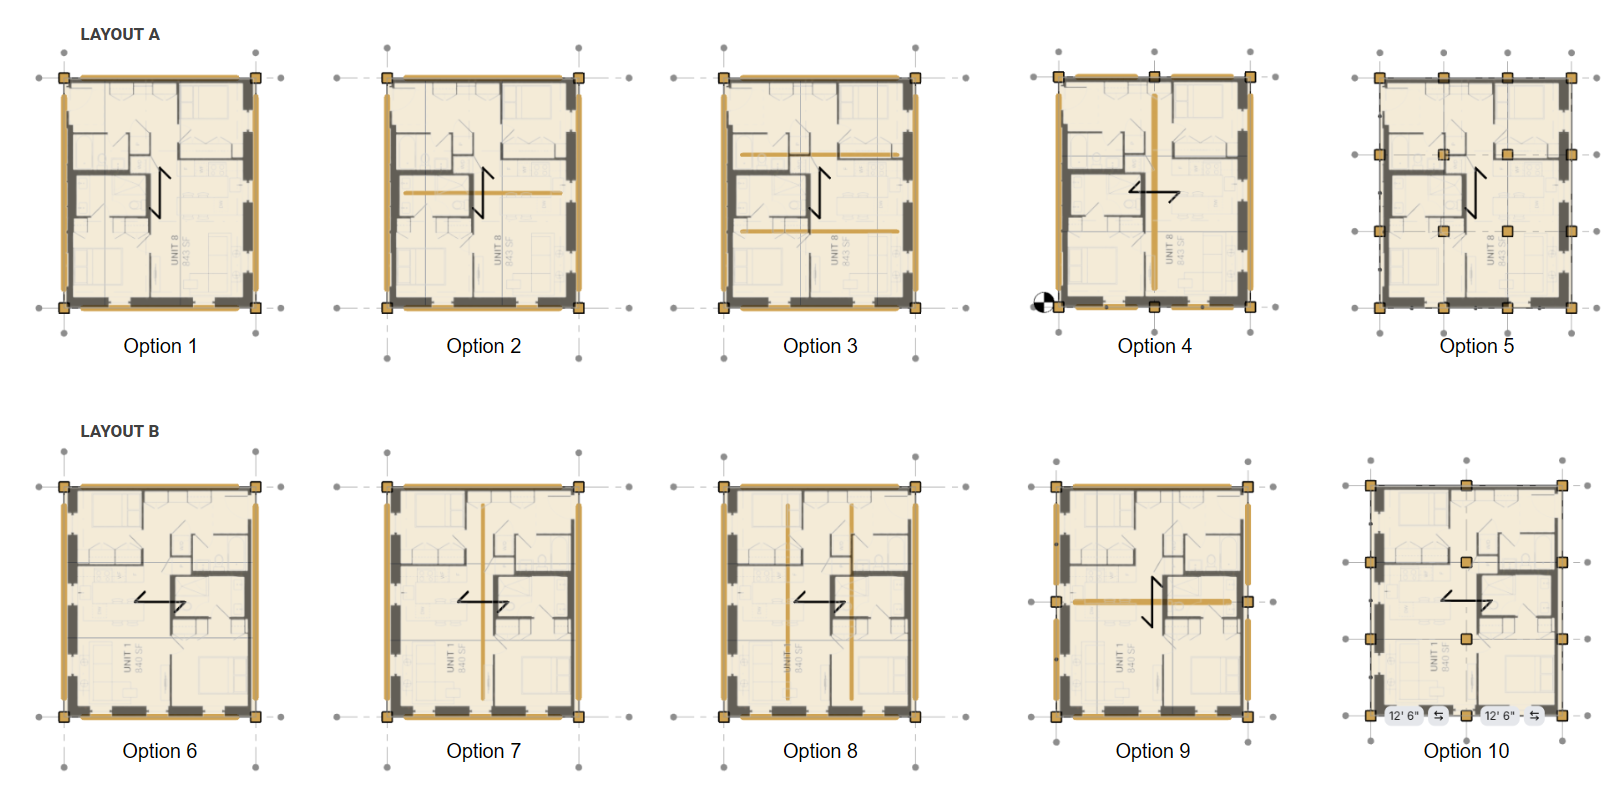
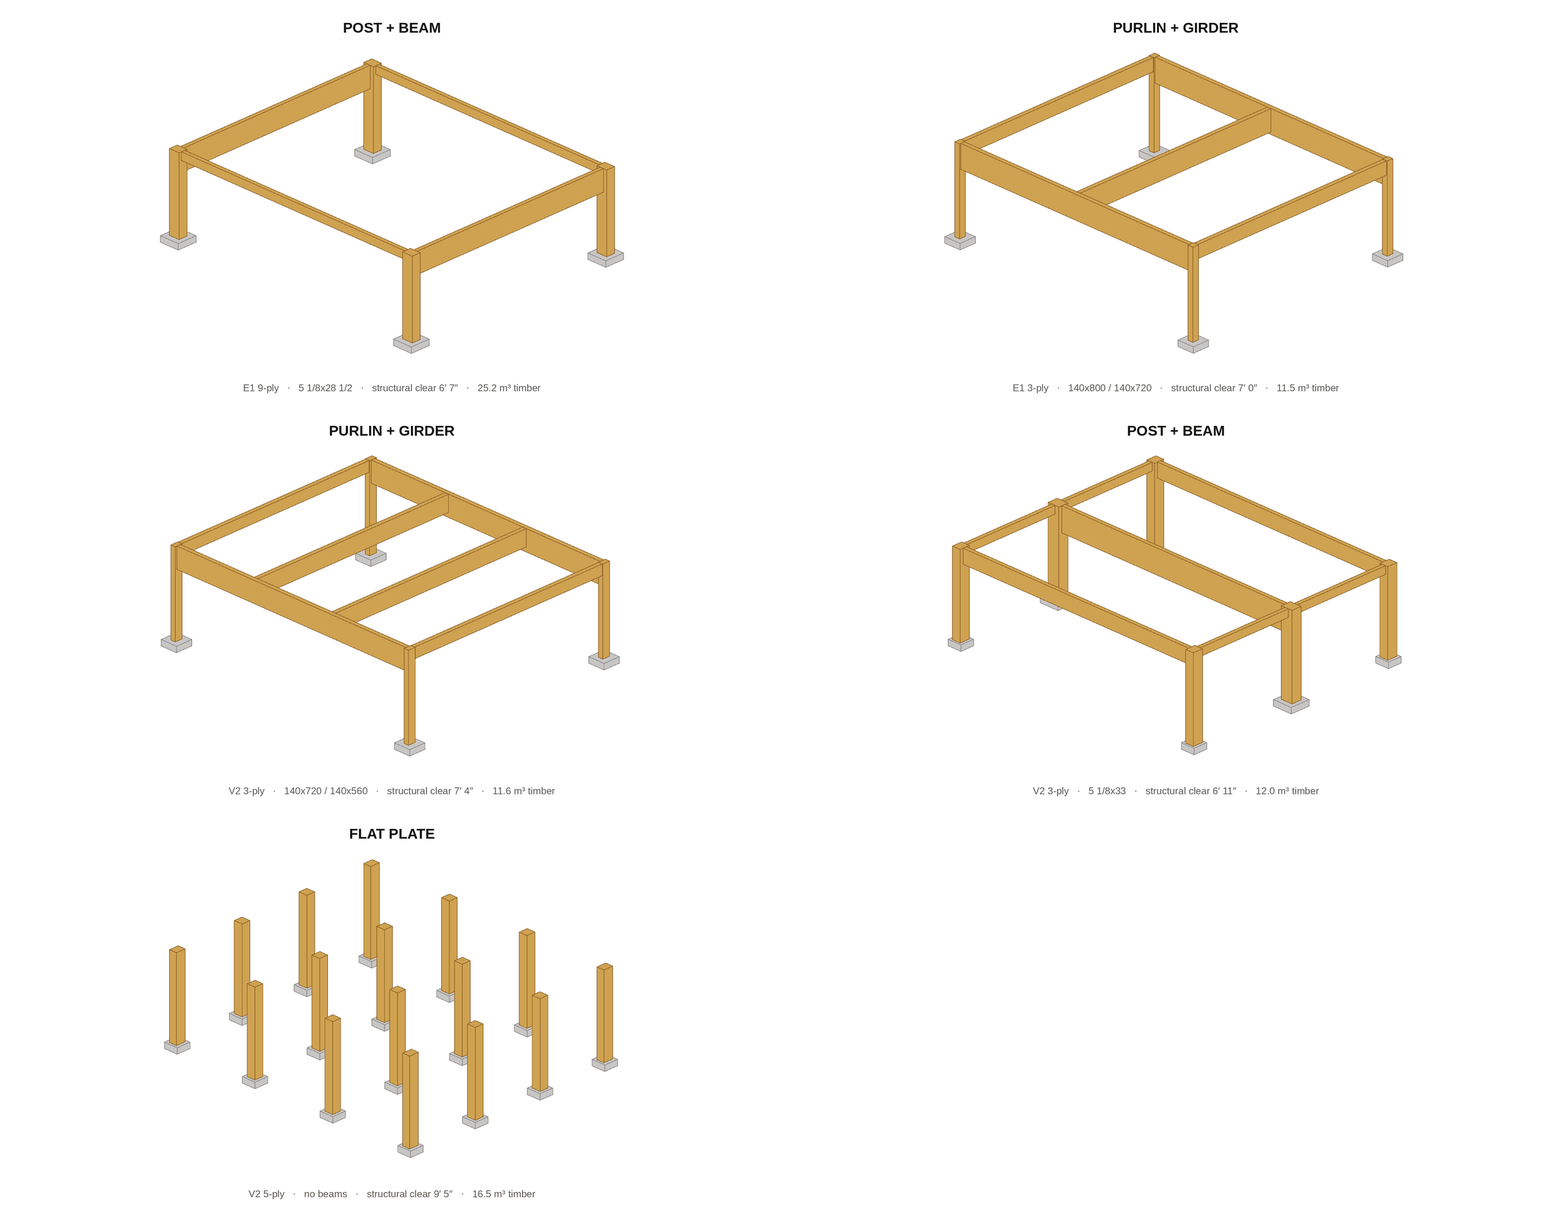
Fewer columns can open up a room, but longer spans may need deeper beams or thicker panels. Adding beams shortens panel spans, with more framing to coordinate. Removing beams puts more demand on the panels. Each choice affects the space beneath the structure.
Branch Concept can give us insight into our design in a few ways, and here we will look at output volumes, structural depths, and structural utilization. By default, Branch Concept will automatically size structural members, and we can see how changes to the grid affect the framing system below. Selecting a beam shows its depth and the structural clear height beneath it. That clearance still needs to accommodate services, ceilings and finishes, and we can get a sense of how changes affect that.
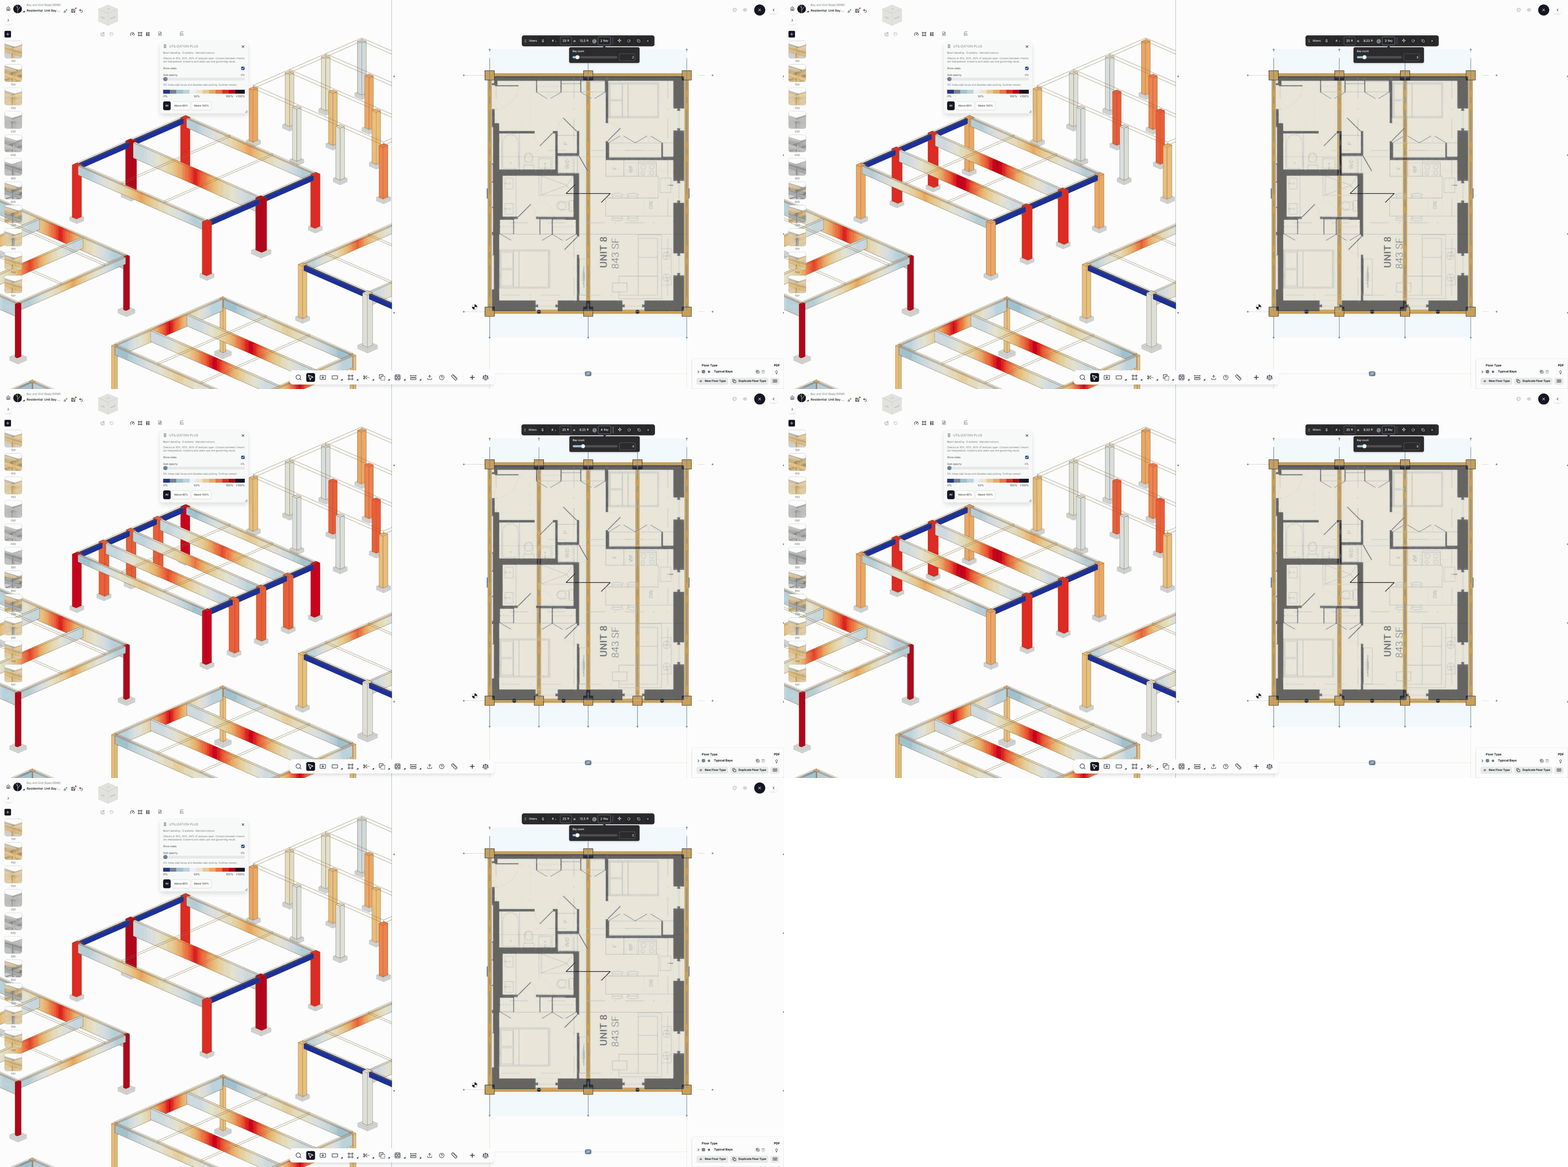
Adjust the grid with the room plan in view. See where the supports land and how the structure responds.
Comparing out the long span option #1 with the others, it’s immediately it’s clear that long spans reduce head height within our unit, but use high volume. Added framing will reduce the size of panels, up to a point - there is a big difference between option #1 and #2, but the difference between #3 and #4 is much smaller. Eventually the extra framing doesn’t help that much, and we can get a sense of this by visualizing utilization. Utilization expresses a structural check as a percentage of its allowable limit. At 80%, the result uses 80% of that limit; above 100%, the check exceeds it.
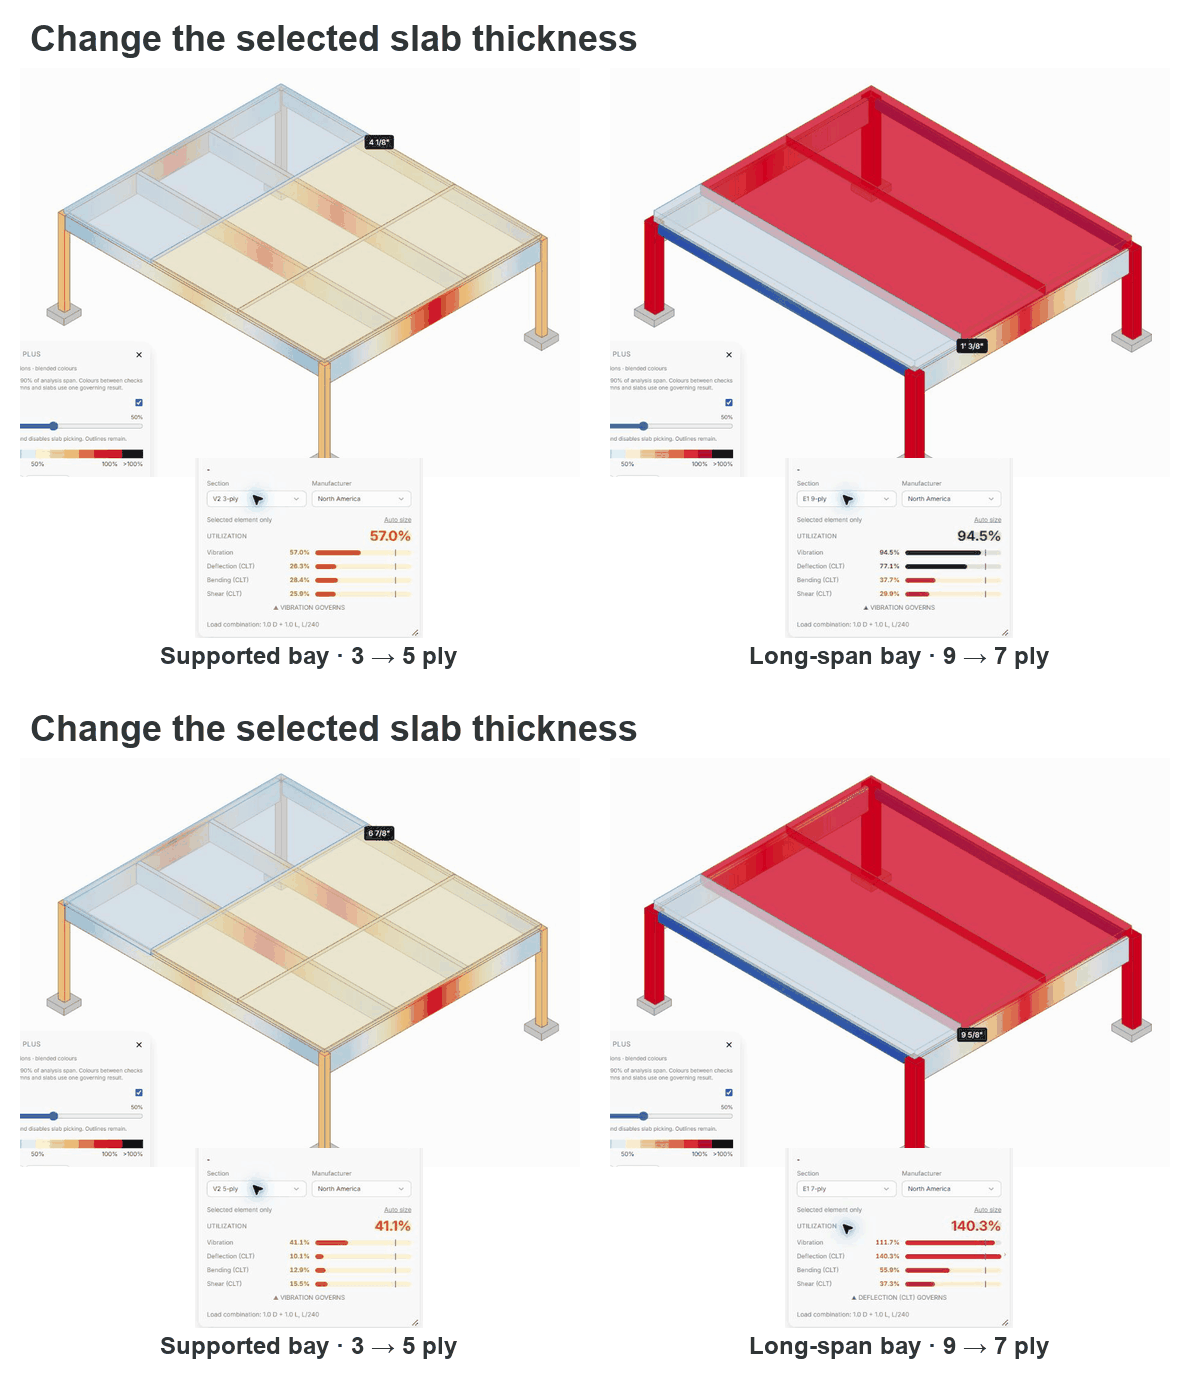
As we change the grid, the colours help us see how the structure responds. Blue indicates lower utilization and more spare capacity while red indicates higher utilization and less spare capacity. Branch will shoot for as close to 100% utilization as possible, so if the utilization is low it means we’re bumping into a limit - there aren’t any smaller sizes left to choose.
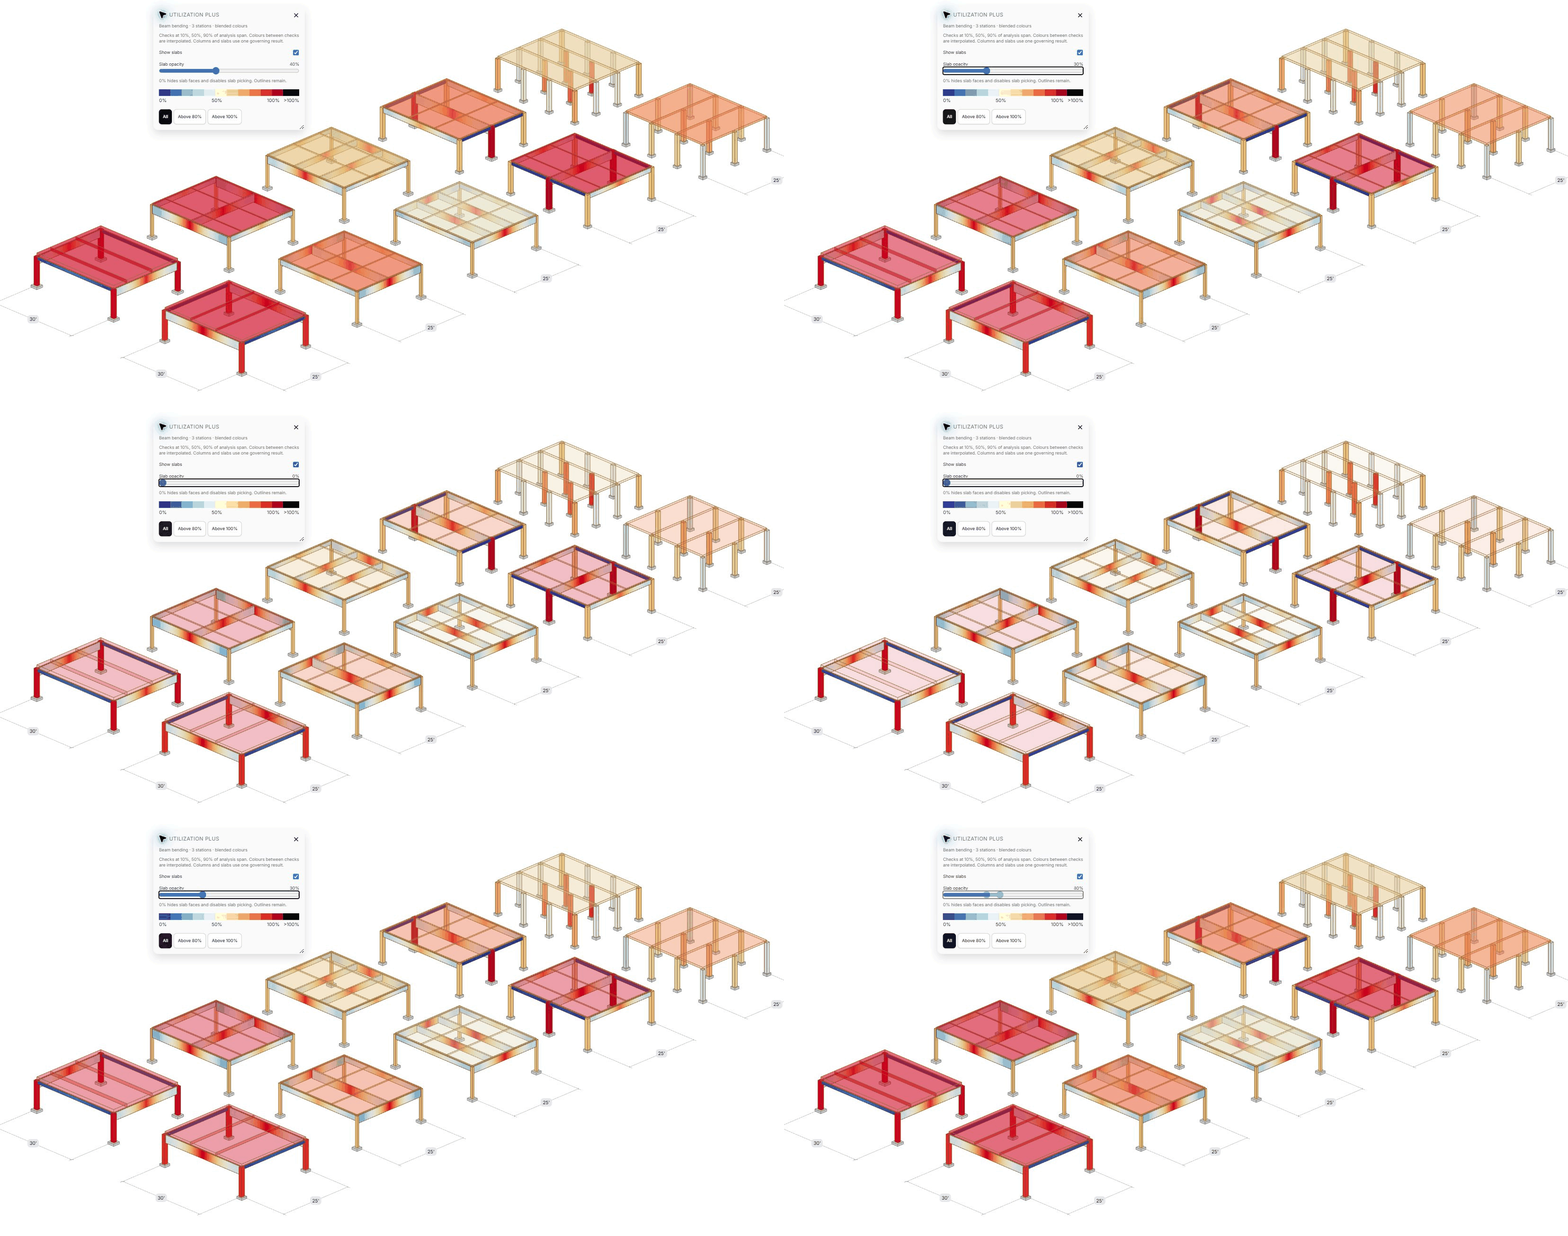
Read utilization across the options, then look beneath the panels to inspect the framing.
We can also manually force elements to be a certain size - if you can change the size of a panel or a beam and Branch Concept will give you real time feedback on if that size meets the utilization, similar to the input a structural engineer would provide in early design on member sizing.
Changing slab opacity reveals the beams beneath. Select a member to inspect its checks and calculations; the beam colours shown here represent bending utilization.
With ten bay options modelled, Branch Concept can generate a Bay Study report with a click of a button. Plans, axonometric views, member sizes, structural clear heights and material volumes sit side by side, ready to compare and review.
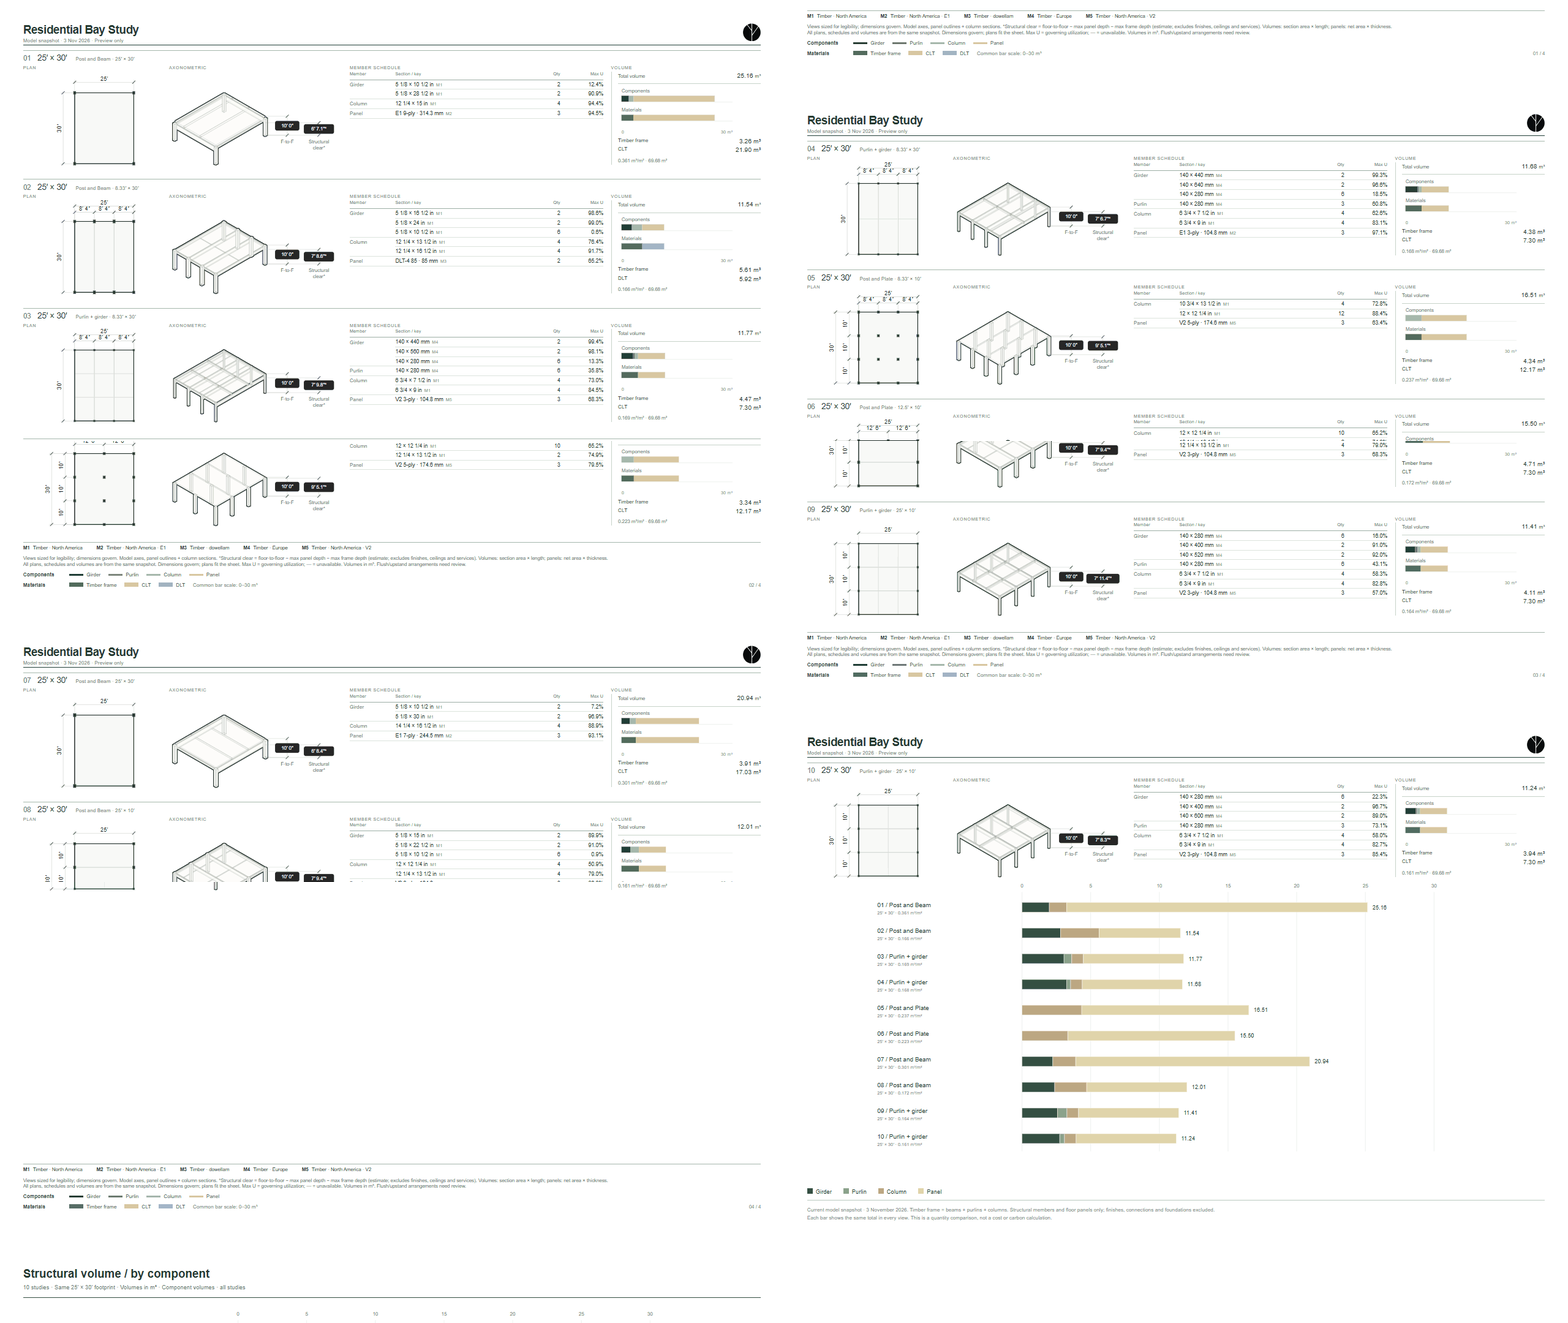
Compare the same footprint across drawings, member checks, clear heights and material quantities.
The material breakdown helps us shortlist options that use less material, then compare their structural clear heights and column and beam positions against the plan. A smaller quantity still needs to work for the rooms and the services.
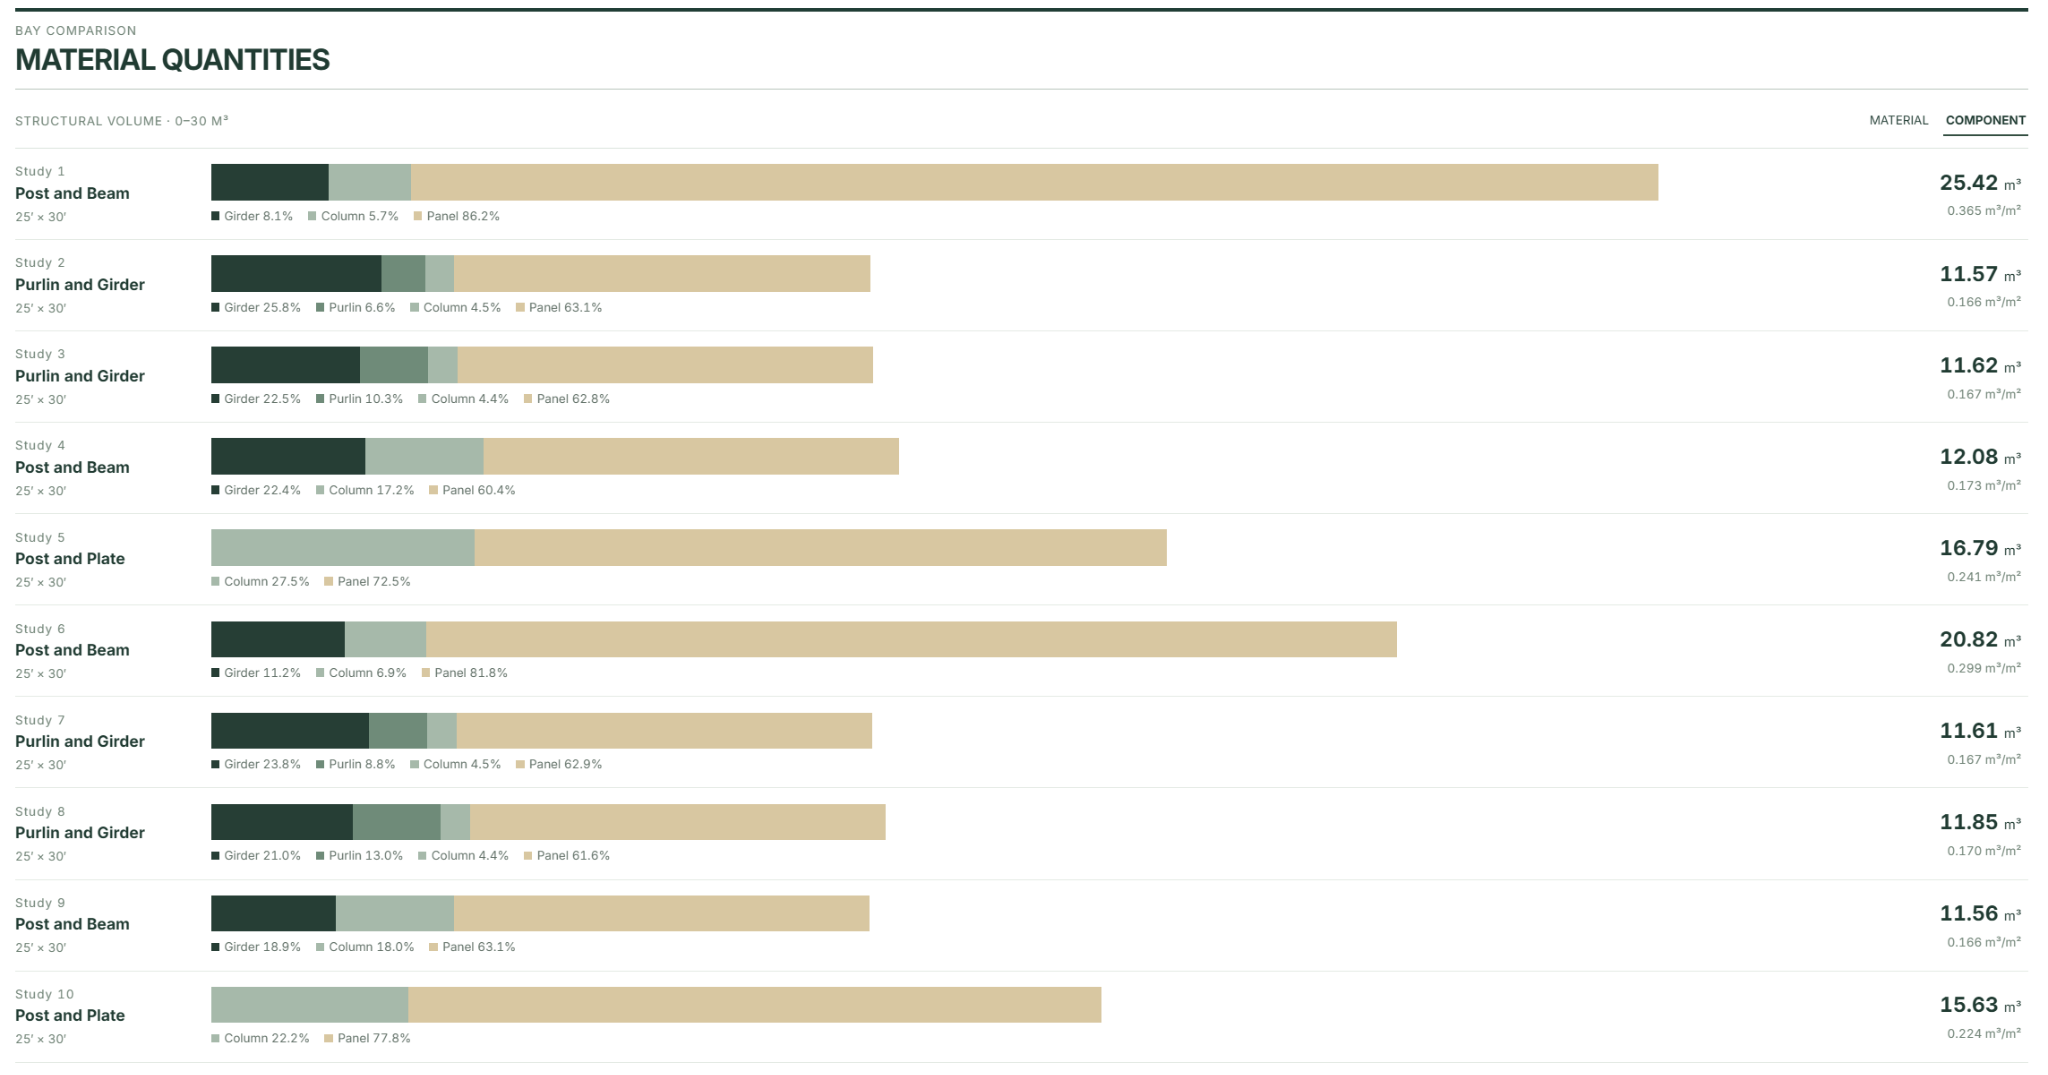
Material quantities by framing option on the same footprint. Volumes are not cost or carbon results.
The shortlist gives us specific questions to take forward with the design team. For the beam-supported options, how will mechanical, electrical and plumbing services run relative to the beams and the units around the core? A point-supported plate can offer more clear height beneath the slab, but its columns still need to fit the rooms and circulation.
Continue with the building-level grid study.
Bring a typical plan and two or three structural questions. Branch is open for project pilots: request beta access.

